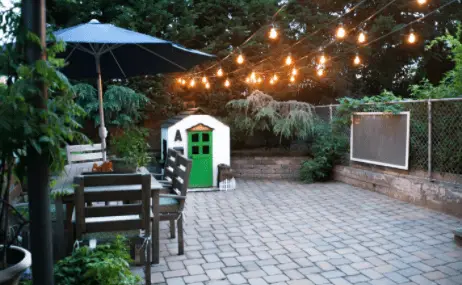
You have invested lots of time and resources in building yourself a nice and cozy patio, congratulations. Now you can take a time out from the monotony and unwind on the patio. You can even hold those private parties and meetings.
Bearing in mind that some of these activities feel best when held in the evening or at night, the project is far from being complete without some lights.
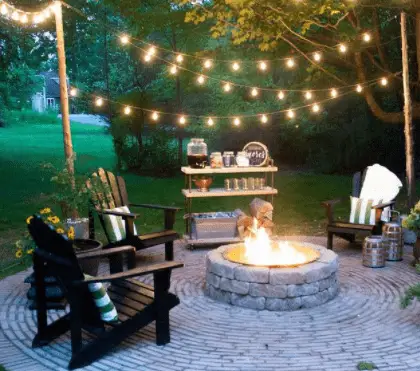
String lights work the best outdoor due to the ambiance they add to the patio. They also come at a fair market price.
They can as well used to light up the sidewalk leading up to the patio. Most importantly, string lights are less demanding to install and use. It is also easy to fix string lights that are not working. With these simple steps, you can install a nice string lights system without taking much of a toll on your depleting budget.
How to Hang Outdoor String Lights
Here is how you can easily hang your outdoor string lights:
1. Plot out the path of the string lights
The process of hanging string lights on the patio begins by you plotting the path where the system will follow. If your patio is already covered, your string lights should fall on the underside of the patio roof. In this case, the path can be on the rafters, the beams, or along the edges.
To hang string lights across backyard, you may consider using poles or trees around as a support. What is important is to ensure the lights are well anchored to prevent them from falling down.
Whatever pattern you choose depends entirely on your unique taste and preferences, as well as what you are looking to achieve with the light system. Having done that, pull a ladder and use it to climb up to take the measurements of the path.
The measurements of the path help you determine the length of the string lights you need for the project. Ensure the lower part of the ladder is in firm contact with the ground for maximum support. Better still, have a helping hand to support the ladder just to be assured of your safety.
2. Mark the anchor points
While standing on the ladder, use a pencil and a tape measure to mark the anchor points across the path the string lights will follow. Ensure the gap between each bulb is even across the path.
For a taut string lights layout, include as many anchor points as possible. For a saggy string light design, mark just a few anchor points. For uniformity, ensure the anchor points on the beams on one side match with those of the opposite beam.
3. Gather the items you need
I always insist on preparing for projects adequately by making a list of the items you need. Making a list works to your advantage in so many ways; it saves you money bulk buying always comes at a discounted market price. It also saves you time since you do not have to keep rushing to the electrical supplies store because you forgot some items.
Among the items and tools you need for this project includes; mini metal carabiners, screw eyes, ladder, pencil, string lights bulbs, an extension cord drill, a pencil, and an outdoor timer
4. Purchase the string lights
Now that you have the measurements of the length of the string lights and a list of other items you need for the job, it is now to go shopping. It is also at this stage where you decide on the type of bulbs you want for your patio.
Light string bulbs come in a wide array of warmth, shape, and size. There are small, medium, and large string light bulbs. In terms, of warmth, you can decide to use incandescent or LED bulbs.
Incandescent bulbs give a soft warm ambient light and while CFL and LED bulbs are cooler and brighter, they do not give off much ambiance.
I will go with medium-sized, incandescent string light bulbs any day. If for example you measured 59.7 ft. length of the path where the string lights will pass, and you are buying the 10ft boxes of string lights, you will need 6 such boxes.
When buying the string lights, always remember to round off the measurement to the nearest 0.5ft. This allowance covers the part that will be threaded to the outdoor power plug.
5. Test the string lights
The manufacturer of your preferred string light system is human and is bound to make mistakes sometimes. And that is not all; damages may happen during the shipping of the string light bulbs. This, being the case, therefore, it is important to test the system and that all the bulbs are working before you give it a clean bill of health.
To do this, plug the string lights to an outdoor power source and turn on the power. If you test and one of the bulbs happens not to be in working condition, then you can always go back to the store for a refund or exchange.
You do not want to go through all the hassles of hanging the string lights only to discover some few bulbs are breaking the chain.
6. Drill the screw eyes holes
Using a power drill, make 1-inch holes into the marks previously made. To make the holes, hold the drill tip onto the marks at an angle of 90°.
The diameter of the holes depends on the thickness of the screw eyes. The thickness of the holes should be slightly smaller than that of the screw eye.
7. Install screw eyes
Using your hand, gently rotate the screw eye until it is firmly tightened into the hole. Repeat this for all the holes and ensure the screw eyes are facing the upper side. This is to prevent the chances of the carabiner hooks coming off the screw eye.
And while you are doing that, add some bits of caulk into the hole to ensure the screw eyes are tight and that they will not become loose due to expansion, going into the future.
8. Attach the string lights
Take one end of the string lights and plug it onto the outdoor power source but ensure the switch in the ‘off’ mode. Then using the mini carabiner hook, clip the hook on the upper side of each bulb to the screw eye.
Start at the end neat the outdoor power plug and work your way away from it. The mini carabiner hooks are best because you can always easily unhook the string light system and hook it back anytime you want.
Having done that, turn the string light system on, then give your friends a call and have a lit party.