Patios being the places to go and unwind during the warmer summer and spring months, need to be clean as much as possible. One type of floor that has proven to be very reliable at patios is the pavers.
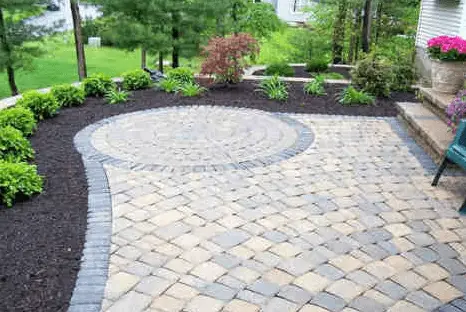
Pavers come in a wide array of designs, shapes, and colors. Properly installed pavers on patio floor can give you decades of service. The installation of patio pavers on dirt does not have to be rocket science.
In this discussion, I will take you through an easy and simple process of laying pavers on dirt and leave your patio looking great.
How to Lay Patio Pavers on Dirt – Steps
You can build a patio easily through the following steps
1. Draw your overall design and pattern
It is usually essential to first sit down and prepare adequately for a project you are about to undertake. This is because, the success of a project lies in the kind of preparation you are going to make.
Preparing for laying of patio pavers on dirt involves deciding where you plan to build your patio. It is also at this stage that you design and draw the layout of your patio, to scale, on a piece of paper so that you will transfer it to the actual patio, later.
Even if you do not have a problem in deciding the location of your patio, it is always best to consult your family because they might enlighten you on something that you might be missing. After all, you will be reading from the same page.
2. Mark the borders for excavation
It is now time to transfer the layout drawn to scale to the ground and mark the borders for excavation. Use landscaping spray paint to mark the borders on the ground and ensure to use some flags to mark the edges.
Unlike the landscaping spray paint, marking dust may be blown by the wind, forcing you to repeat the process.
It is at this stage you should call in the city inspectorate department to inspect for possible gas and water lines. This is because this project might interfere with lines. This might accrue some unnecessary repair costs on your part, something you will want to avoid by all means.
3. Purchase the pavers
Patio pavers come in many designs, sizes, and shapes. Depending on the square footage of your patio layout, you will know just how many pavers you need, the shape and material of the same.
For a square patio layout, square or rectangular shaped pavers are the best since these minimize the need for cutting the pavers, and this works by reducing wastage. Although there will be quite some cuttings, even a circular patio layout can also go with either rectangular or square-shaped pavers.
For beautiful colors, you can go with clay pavers; on the flip side, you will have to apply a sealant every year otherwise they won’t last for long. Concrete pavers are the best since these will stand the test of time due to their compact nature. Ensure to purchase 10% more pavers to cover for breakages and replacement going forward.
4. Remove the vegetation
Pace a shovel long the marked edge of the proposed patio. With one leg placed on the shovel tip while holding the handle with both hands, press the shovel into the ground to a depth of between 7 and 8 inches. Slant the shovel and scoop the dirt then transfer it somewhere else.
Starting along the edges and working your way across, remove all the vegetation from the layout. Ensure to scoop the grass from the roots to avoid growth between the pavers. If tree roots are cutting across the layout, ensure to cut them otherwise they will damage the patio.
5. Level the ground
The patio layout may not always be level due to tree roots and vegetation. The need for the leveled ground is to make sure the pavers will also be level; you do not want the feel of raised spots on the patio.
But even as you do this, ensure to slope the patio ground away from the house to prevent flooding your house with groundwater. To do this, place two spikes; one on one end of the patio layout and another on the other end. Tie a plastic string on both spikes and tighten.
Using a metallic garden rake, level the ground following the direction of the attached string. Keeping shifting the spikes to different spots and observe the string. A level ground surface should be touching the string. The spike near the house should be slightly higher in the ground than the one away from the house.
6. Pour compactable gravel
Before pouring the gravel, ensure to compact the leveled ground by using a hand tamper. You can also use a rented plate compact for a firm foundation. Then pour in compactable gravel; gravel is crushed concrete and is best for base drainage of the patio.
Be careful not to pour in too much gravel because you might end up with pavers raised above the surrounding ground.
7. Pour fill dirt
Then pour in clean stone dirt to compact the gravel. Gravel alone has lots of spaces between them and this will provide a shaky foundation for pavers and they may not last long.
Clean stone dirt means one void of vegetation, plant seeds, and soil. Then pound the ground using a hand tamper for a more compact foundation.
8. Put down geotextile fabric
Geotextile fabric is a material used in landscape foundations. It works by preventing the growth of vegetation beneath the pavers, as well as the penetration of insects like termites. It is also used to firm up the base even more, while at the same time improve drainage beneath it.
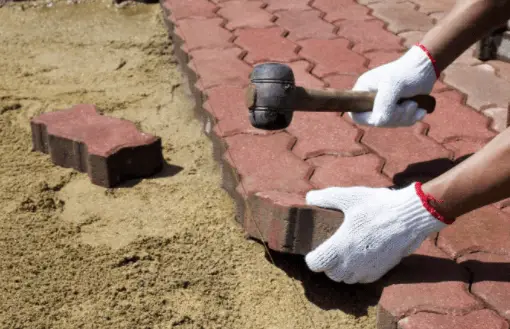
9. Lay down patio pavers
With a firm and solid foundation, Now comes the main event of the day; the laying of the pavers. Start laying the edges and work your way to the center, making sure they compactly flush against each other. The pattern you are going to follow depends on your unique taste and preferences.
Using the string attached to the tow spikes, you will know the pavers are level when their top surface touches the string. You will need a hand hammer for driving the pavers into the ground. But even as you do this, be gentle because too much force might break the pavers.
Use a circular saw with a diamond blade to cut the pavers when necessary. Square and rectangular shaped pavers reduce the need for cutting, hence reducing wastage and in turn saving you lots of money.
10. Compact with stone dust
Spread stone dust all over the surface of the pavers. Then use a plastic bristle broom to sweep it across the surface. The dust works by filling the small crevices between the pavers, and this provides a very compact design for durability.
Observe the crevices to see if they are fully closed with dirt. If not, add some more stone dust and sweep across. The presence of the small crevices is an indicator the pavers are far from being completely compact.
Some people might prefer sand but I insist on stone dust. Stone dust is finer and will thus easily fit into the crevices for a more compacted design. Sand, on the other hand, has larger particles that will be hard to fit into the crevices, and this leaves a shaky paver design. To prevent your pavers from shifting or spreading in future, install a paver edging.
11. Place urethane pad over the pavers
Sweeping the pavers with stone dust is not enough; it needs to be compacted if at all the pavers are going to last for long. A urethane pad is a panel that reduces impact while compacting the already laid pavers.
The need for reducing impact is to prevent breaking the pavers. It also allows for use of controlled force to drive the bricks into the ground, while the stone dust settles firmly between the bricks. This is a critical step because compacting the paver bricks without the pad would be too dangerous.
12. Sweep with stone dust
More compacting creates bigger and deeper crevices and this means the project is far from over. Leaving the crevices unfilled and uncompact would only leave you with a weaker paver design that will not stand the test of time. To prevent this scenario, spread stone dust across the surface and sweep again and the bricks should now be solid.