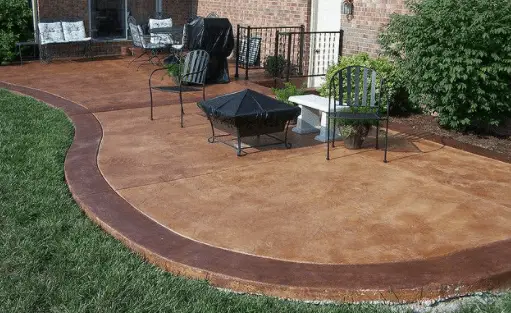
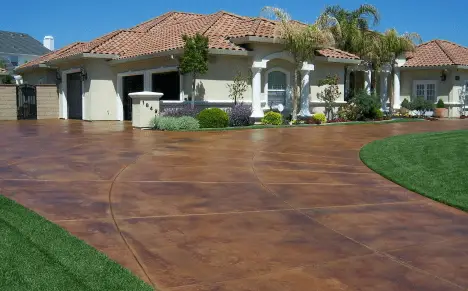
Are you planning to give your outdoor space a facelift? Concrete staining is a popular way of changing your plain grey concrete patio, driveways or walkways to any color of your choice by applying a concrete stain.
Beautiful earth-tone hues can be achieved by use of acid based stain. For other color options, water-based acrylic stains for concrete are also available.
Besides increasing the aesthetic value of your outdoor, other benefits of staining a concrete include the following:
- Durability: A stained concrete is extremely durable compared to a plain one. Staining and sealing prevents fading, chipping or peeling. For that reason, your concrete will stay intact for many years.
- Low cost of maintenance: Concrete staining evens out the surface and makes it smooth. This limits trapping of dirt and water thus enhances easy cleaning. In addition, due to limited fading and chipping, little maintenance is carried out.
- Cost efficiency: Staining restores old concrete to look new again thus saving the cost of replacing or investing in a new one.
- Color choice flexibility: You can stain a concrete patio to look like a stone or something you desire thanks to broader array of stain color options.
Acid staining create a permanent color effect that is ingrained into the pores of a concrete thus best for both old and new concrete. While acrylic stains may give you color flexibility options, they are not as durable as acid stains. With time, acrylic may fade or peel up and thus perceived as costly in the long run.
The process of applying a stain on concrete may take a steady hand to pull off some patterns and color effects correctly. You may therefore need to hire professional service.
In case you are also considering painting your concrete patio, you can read our detailed guide here!
How to Stain a Concrete – Steps
Step 1: Preparation
In very project, preparation is usually important. Remove patio furniture, umbrella and any other items from the space.
If you want some sections of the concrete patio to have different colors, mark and cut decorative kerfs using a saw. Mist the saw blade with water to reduce or contain dust.
Check the concrete to find out if it is contaminated with oil, waxes, glue, paint or anything that may interfere with stain penetration into the pores. You should also test if the concrete is sealed or not.
Pour a little amount of water on the surface, if the water soaks in, the concrete is not sealed and good to go. If it beads up then you need to remove the sealer before staining.
Step 2: Cleaning/ Stripping Sealer
The concrete surface to be stained has to be cleaned to remove any contamination that may prevent stain from penetrating into the pores. Commonly you will find petroleum products such as oil and grease on the concrete.
You will need to degrease using a stain prep or a degreaser. These are solvents that deep clean and lift up any oily or petroleum contaminations form concrete.
Apply the stain prep as directed by the manufacturer. Let it sit for 5 minutes or more if you are removing tire marks or old grease from the concrete. Scrub with a stiff bristle brush and follow with a thorough rinse using a hose.
To remove a sealer or wax you will need a solvent such as Xylene or a wax remover respectively. Apply and let the solvent to sit for a while and scrub with a brush. Power wash the sealer or wax off the concrete. If you have paints, glues and other sticky contaminations, use a paint stripper or glue remover before rinsing.
After cleaning, ensure that your patio is completely dry. Be sure to follow the manufacturer’s instructions for applying a stain. It is also much wise to test the stain on a small area before applying on the all of the concrete so that you can see what the outcome is.
After satisfied with the test results, wear a safety gear to protect your face, eyes and skin from chemical fumes. Proceed to the next step of applying the stain.
Step 3: Applying Stain
You will need a paint sprayer, paint roller and a handheld brush for tight corners and smaller areas. Work in sections if you are dealing with a large area. Remember to order a little extra stain if you are dealing with old concrete since it takes time to accept and react with the stain. After spraying, go over with a paint roller to achieve a smooth and even finish.
Check if there is any residue left. This is common if you are using acid based stain. Water based stains does not generate too much residue. To remove the residue use a neutralizing solution of water and baking soda in parts of 4:1. Apply using a clean sprayer different from the one you used for staining.
Allow the stain at least 24 hours to cure before you move to the next step of applying a sealer. You do not want to get cloudy or milky finish after applying a sealer on uncured concrete.
Step 4: Seal the Concrete
Once the stain is completely dry, it’s time to apply a protective seal using your favorite concrete sealer. A protective sealer reduces maintenance cost by protecting the concrete from fading and peeling, they also repel dirt and water among other contaminations.
There are a range of tools that can be used to apply a sealer including paint rollers and pump-up sprayers. Here is a complete guide on how to seal a concrete patio.
We recommend water based sealer for your newly stained concrete rather than solvent based. Apply a thin coat of your sealer using a nap roller as you work from one side to the other. Allow it to dry completely before you apply the second coat and allow the sealer two days to completely cure.
The Bottom Line
The process of staining both new and old concrete is the same. Fresh concrete should be allowed at least three weeks to cure before applying a stain. We recommend staining your patio, driveways and other concrete spaces to make them beautiful and durable. If you don’t find it fit to handle the task yourself, consider hiring a professional expert.